Can you walk the walk?
Installation
Athena Package Installation Quick Steps:
- Download Installation package
1. Go to Athena Exam page and click on Download page link.
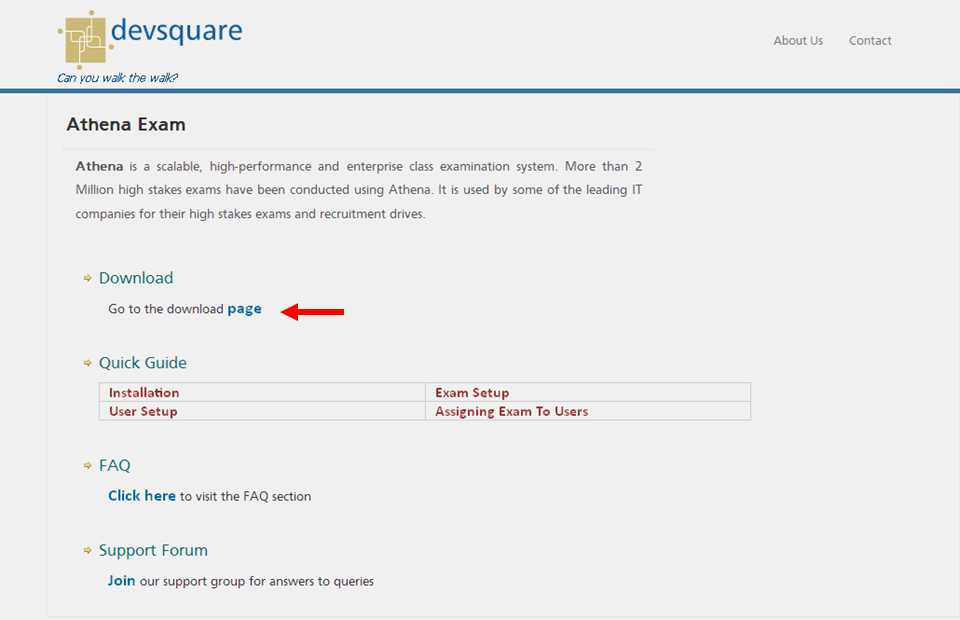
2. On clicking takes you to the download page.
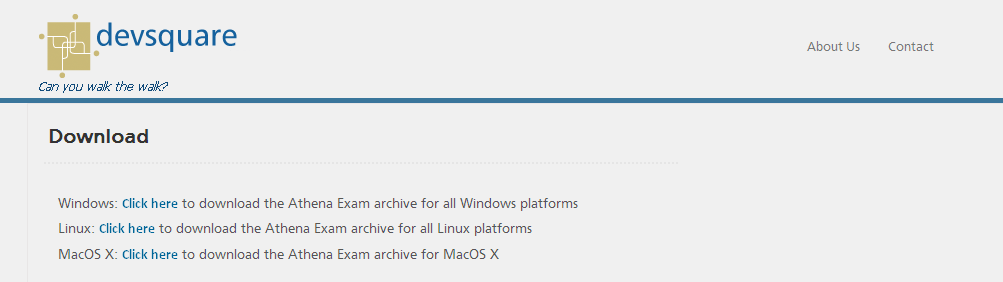
3. To download the linux installation package click on Click here link.

4. Save the file locally.
5. Unzip (Extract Here) the package.
Command: unzip athenaexam_3.1_linux.zip
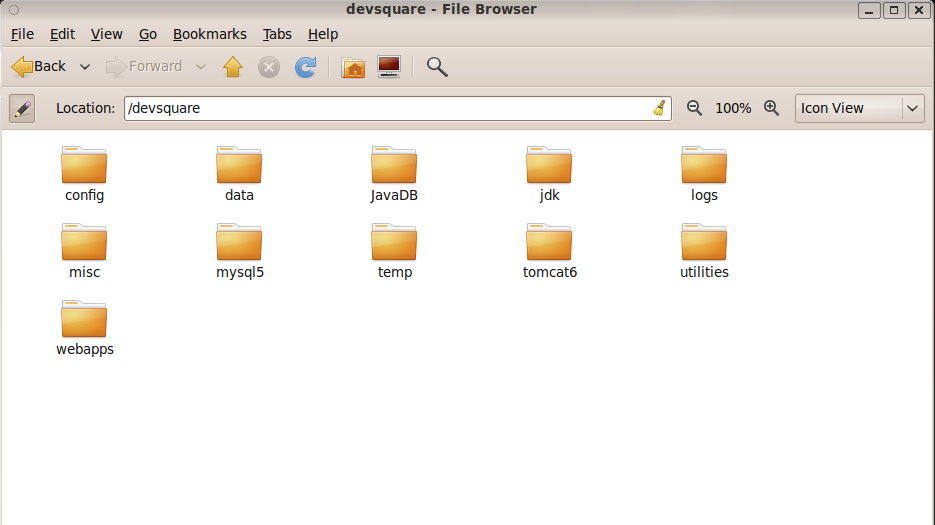
6. Make sure that the extracted file name is devsquare and should contain all the files.
7. Place the devsquare folder in root directory like this ("/devsquare")
Up to here you have downloaded the Installation Package successfully and unzipped , In the next steps we will show you how to install and configuring the required supporting software’s.
- SetUp MySQL tables.
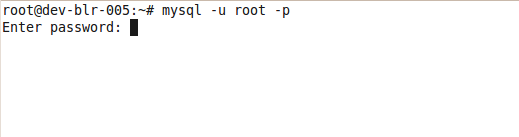
1). Open Terminal at
Applications >> Accessories >> Terminal.
2). Login into MySql with root password.
3).Grant full privileges for the root and used database.
mysql> GRANT ALL PRIVILEGES ON database_name.* TO 'DEV_MYSQL_DB_SYSTEM_USER'@'machine_name' IDENTIFIED BY 'DEV_MYSQL_DB_SYSTEM_PASSWORD'
4). Create a Database datasource.
mysql> create database datasource;

5). Load tables into the database form the provided sql file at (/devsquare/utilities/database/datasource.sql)
Open a new terminal and enter the following command.
Syntax: mysql -u user –p database name < path of datasource.sql file
cmd: mysql -u root -p datasource < /devsquare/utilities/database/datasource.sql.

6).Run cmd:
mysql> use databasename;
mysql> show tables;
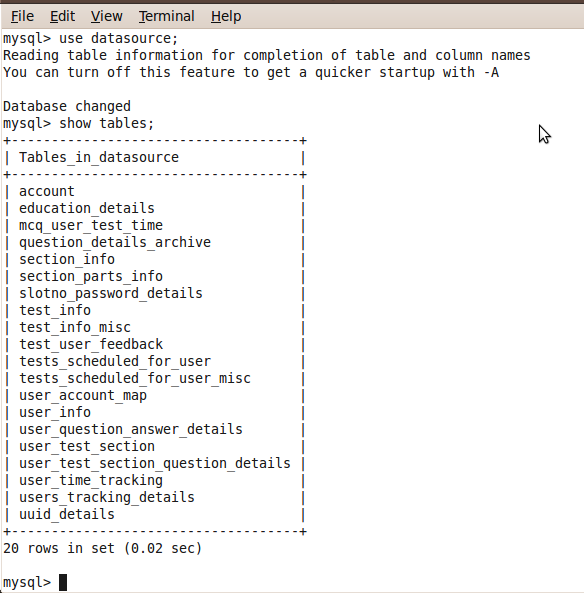
7).Make sure that all tables were created.
- Configuring Tomcat
1. Edit server.xml at (/devsquare/tomcat6/conf)
2. Change the drive paths according to your devsquare path.
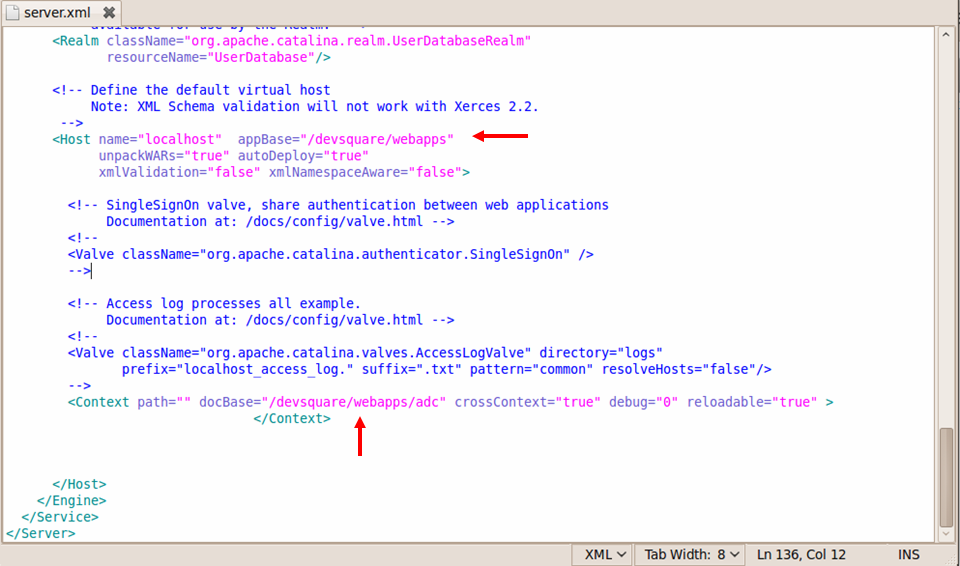
3. Save the server.xml file.
4. In devsquare\config\mcq folder, you can find mcq_constants.txt make sure the IP address is localhost or the IP of the server you configured.
5. Change the other constants like DB_SERVER, DB_SERVER_PORT ,DB_NAME ,DB_USER,DB_PASSWORD by entering your values and save the file.
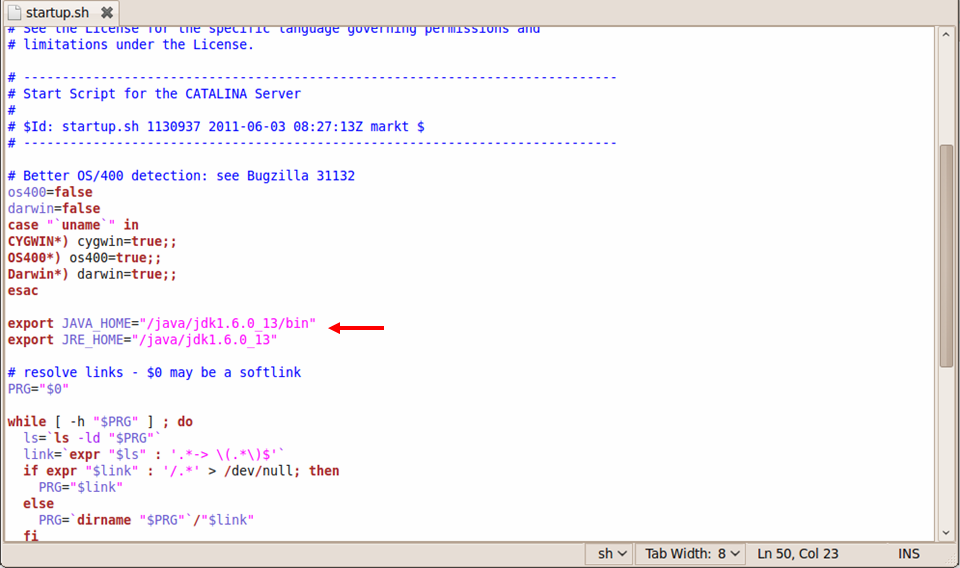
4. Go To tomcat bin path: /devsquare/tomcat6/bin in terminal
5. Add JAVA_HOME paths in startup.sh file and save the file
6. To start tomcat: ./startup.sh
7. To stop tomcat: ./shutdown.sh
8. Start the tomcat
9. Check the Environment variables
10. Now setup is done check whether you can able to access this page: http://localhost:8080/adc/mcq/admin/adminlogin.jsp
1. Login URL : http://localhost/adc/mcq/admin/adminlogin.jsp
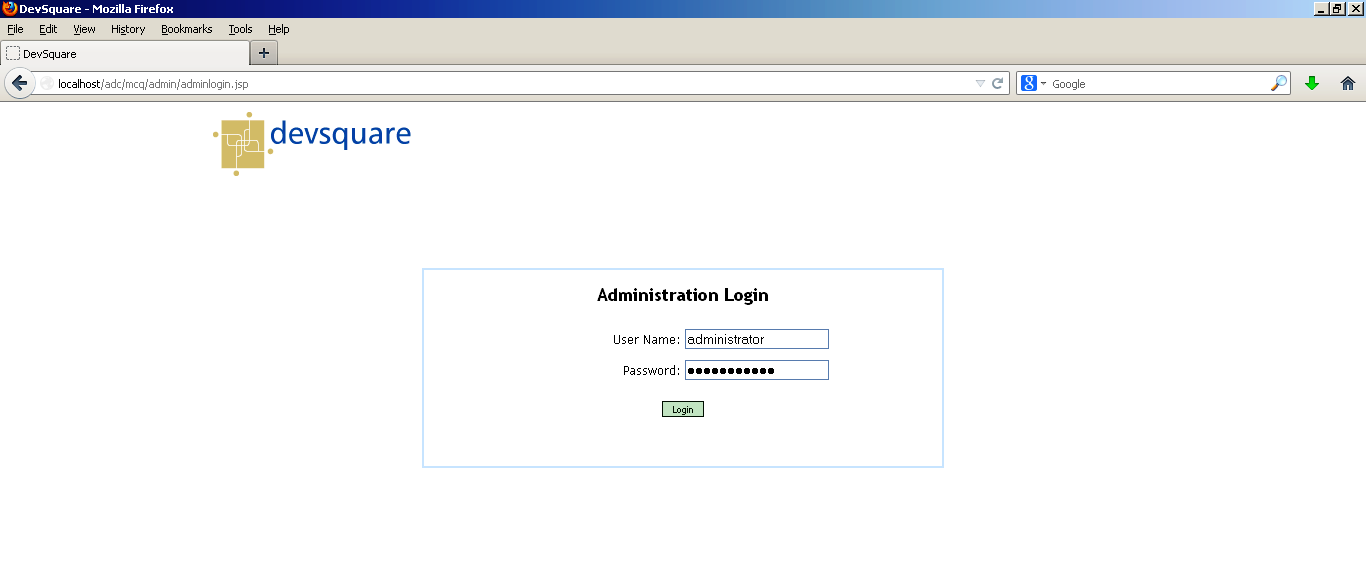
2. Enter username and password and Click on login.
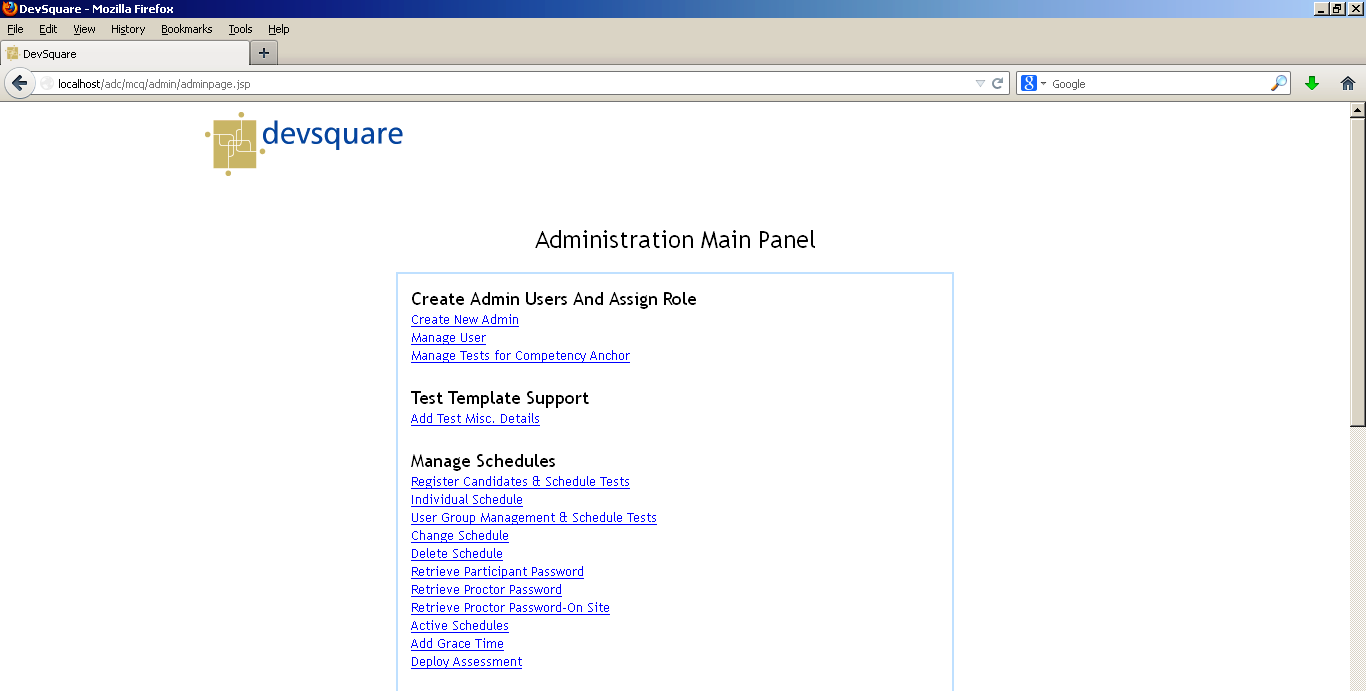
In the Admin page you can able to manage the schedules of candidates and tests.